We know exactly how stressful a leaking roof is, especially when you are waiting for an insurance adjuster to call back. Watching water stain your ceiling forces you to make quick decisions to protect your home. For the full scope of work behind this guide, see our leak & emergency service.
If you are wondering what is roof tarping, it is simply the most effective way to hit pause on the damage. Emergency roof tarping acts as a reliable shield against the elements while you organize permanent repairs.
Our team uses this exact method to secure properties across Connecticut every single week. The following guide breaks down the materials used, the costs involved, and the timeline you can expect.
What Professional Emergency Roof Tarping Actually Looks Like
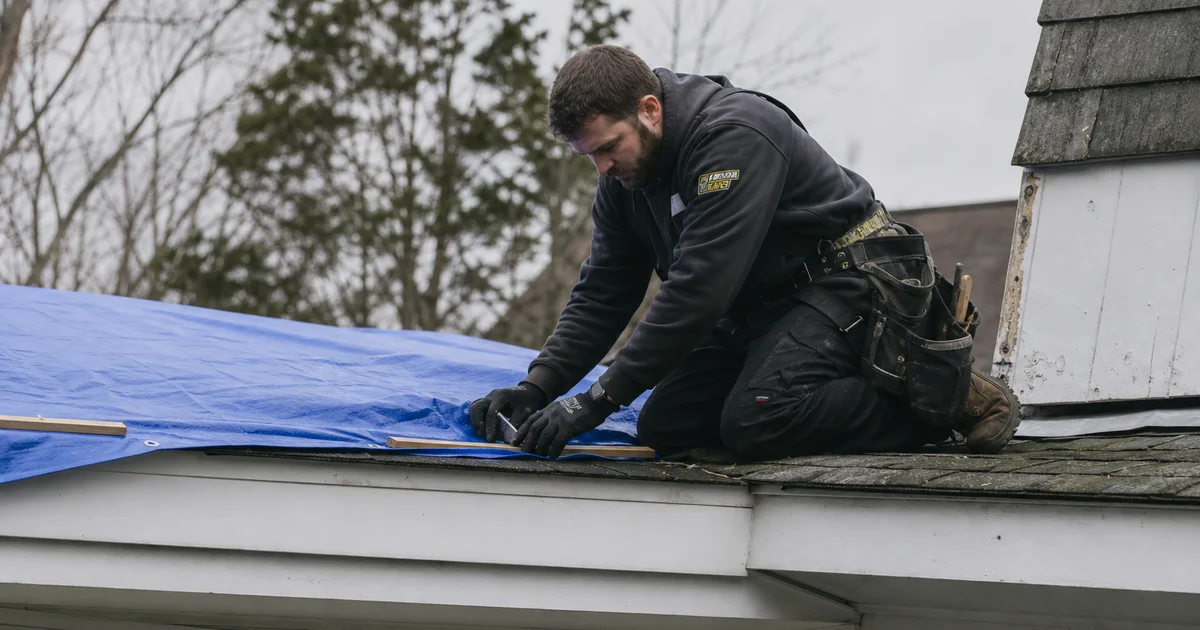
A proper emergency roof tarp covers the affected area plus a 2-3 foot margin around it. The tarp edges are secured beneath the shingle line directly above the damage zone.
We anchor the edges using wood strapping, or boards, that compress the material flat against the roof. The boards are fastened only at the very edges so the existing roof can be re-flashed easily during the permanent repair.
To give you an idea of the quality, professional crews use FEMA Operation Blue Roof standard materials. This means we use a woven polyethylene tarp that is at least 6-mil to 10-mil thick. A heavy-duty 800-denier rating prevents branches or exposed nails from puncturing the barrier.
The result is a protective cover that performs reliably:
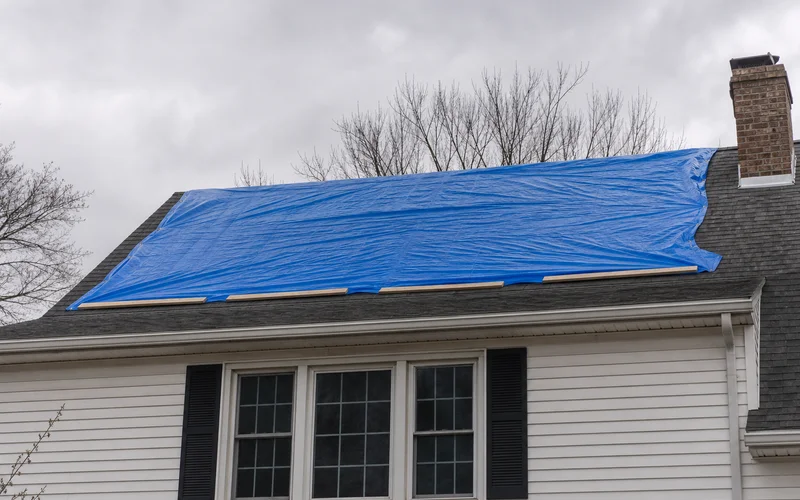
- Doesn’t admit water at the upper edge (it is tucked under the next course of shingles)
- Doesn’t flap in the wind (board-secured edges hold it flat)
- Doesn’t create new leak points (no nails go through intact shingles)
- Lasts 30-90 days under normal weather conditions
DIY Tarps vs Professional Tarps
Professional tarps are engineered to withstand 60 mph wind gusts and last for months, whereas DIY tarps usually fail within days. A standard Connecticut Nor’easter easily produces high winds that quickly rip the corner ties out of a cheap hardware store tarp.
When you hire a professional roof tarping service, the differences matter significantly. We see failed DIY attempts constantly.
When a temporary cover blows off during a storm, the secondary water damage adds up fast. The average cost for water damage restoration in Connecticut for 2026 sits right around $3,800.
| Factor | DIY Tarp | Professional Tarp |
|---|---|---|
| Materials | 2-mil hardware-store tarp + corner ties | 6-mil to 10-mil woven polyethylene + wood strapping |
| Edge securing | Corner-only, often loose | Continuous board-secured edges |
| Upper edge | Often exposed to wind/rain | Tucked under the shingle line above |
| Fastener strategy | Nails through tarp face | Edge-only board attachment |
| Wind resistance | Low (often flies off in the next storm) | High (rated for 60+ mph gusts) |
| Cost | $30-$100 materials | $350-$800 installed |
| Risk | New damage from improper install | Minimal additional damage |
DIY tarps often last 1-3 days in active weather. They also cause additional damage to the surrounding intact roof from improper nailing.
Professional tarps are designed for the 30-90 day timeline that gives you space to schedule a permanent repair. Our crews build these to withstand severe weather so you can sleep soundly until the roof is fixed.
How We Install a Tarp
A typical tarp visit takes 45-90 minutes. See also: What to Do When Your Roof Is Leaking.
The Standard Installation Process
Strict protocols guarantee safety and effectiveness on every job:
- Safety assessment: Confirm the roof is safe to access using a handheld anemometer to check wind speeds.
- Damage zone identification: Locate the actual leak source plus a sufficient margin.
- Tarp sizing and positioning: Cut the tarp to cover the affected zone plus a 2-3 foot overlap.
- Upper edge tuck: Slide the upper edge under the course of shingles above the damage.
- Edge strapping: Apply wood strapping along all four edges, fastened only at the strap ends.
- Photo documentation: Capture timestamped photos for your insurance adjuster using dedicated apps like CompanyCam.
- Walkthrough with homeowner: Confirm the scope and discuss permanent repair scheduling.
Our photo documentation step is incredibly helpful for insurance claims. Clear, timestamped evidence prevents adjusters from questioning the initial extent of the storm damage.
When We Tarp vs When We Don’t
A tarp is the right call when an active leak is present and permanent repairs cannot happen the same day. There are specific situations that determine our response.
A tarp is the appropriate choice when:
- An active leak is present and water needs to stop entering the building immediately.
- The permanent repair cannot be scheduled for the same day, which is true in most cases.
- Weather conditions support a safe installation without active high winds.
- The damaged area is easily accessible to standard tarping methods.
Situations Where Tarping is Inappropriate
We do not install a tarp when conditions pose a severe risk or when it will not solve the issue. The Occupational Safety and Health Administration (OSHA) strictly prohibits handling roofing materials in winds over 30 miles per hour.
A tarp is NOT the right call when:
- The damage is severe enough that the area is structurally unsafe.
- Active high winds make the installation dangerous or futile.
- The leak source is not actually on the roof. Winter attic condensation or HVAC leaks often mimic roof leaks.
- The roof is so close to permanent repair that immediate repair is faster and more cost-effective.
Cost and Insurance
Standalone emergency tarping runs $350-$800. This price depends on several factors:
- Roof access difficulty, including steep pitches, multi-story buildings, or tight yards.
- The tarp size required, ranging from a small section to a full slope.
- The time of day. Requesting an emergency 2 a.m. dispatch can add a 20% to 50% premium to labor costs.
- Weather conditions, since active rain or wind adds complexity and hazard.
Handling the Insurance Claim
For homeowners filing an insurance claim, the tarp visit is typically documented as part of the loss scope and paid through the claim. Standard Connecticut homeowner policies include a “mitigation of further damage” clause.
This means your insurance company actually requires you to take reasonable steps, like tarping, to prevent further water entry. We coordinate the documentation directly with your adjuster to ensure this expense is covered.
What Happens After the Tarp
The tarp buys you 30-90 days. Homeowners looking to tarp my roof CT often ask us about the next steps.
This buffer is critical because peak storm seasons can push local roofing material lead times out by several weeks.
During that 30-90 day window:
- Within 7 days: The permanent repair or replacement estimate is finalized.
- Within 14 days: Insurance documentation is completed if you are filing a claim.
- Within 30-60 days: The permanent repair is installed on the property.
- Tarp removal: This takes place exactly when the permanent repair is installed.
You do not need to make same-day repair decisions under pressure. The tarp protects the home completely. Our process ensures the actual repair planning happens at a reasonable pace.
When to Call
Call (203) 824-0275 immediately when water is actively entering the building or a storm causes visible damage. Reach out when you face any of these situations:
- Water is actively penetrating the roof and threatening your drywall.
- A storm event has caused obvious exterior issues, like missing shingles or fallen tree branches.
- A repair from another contractor is failing to hold up against the rain.
- Your insurance company has requested emergency stabilization before they process the claim.
Our office hours are Monday through Friday, 7am to 6pm. During business hours, an emergency tarping crew is typically dispatched as quickly as possible from the time of your call.
We recommend reaching out before the next band of heavy rain hits your neighborhood. Immediate action minimizes structural damage and keeps your property completely secure.